Koyeb
TIP
Koyeb免费方案包含:
- 1个WebService (500MB内存,地区可选德国🇩🇪或美国🇺🇸)
1个Postgres(Koyeb的免费数据库每月只提供5小时额度,本教程将使用Supabase免费方案代替)
TIP
The Koyeb free plan includes:
- 1 Web Service (500 MB RAM, regions: Germany 🇩🇪 or United States 🇺🇸)
1 Postgres(Koyeb’s free database only provides 5 hours per month; this guide uses the Supabase free plan instead)
Deployment Overview
- Create a database on Supabase to persist OpenList configuration data
- Deploy the OpenList application on Koyeb
部署概览
- 在Supabase中创建一个数据库用于保存openlist的配置数据
- 在Koyeb中部署openlist应用
Prerequisites
- A Supabase account (click to sign up)
- A Koyeb account (click to sign up)
部署前准备
- 一个Supabase账户(点击注册登录)
- 一个Koyeb账户(点击注册登录)
Create the Database
Sign in to Supabase.
- Create a new project.
- In New project, set the Database password and save it. Select Central EU (Frankfurt) as the region.
Choose a region close to your Koyeb server — Frankfurt or Washington D.C is recommended.
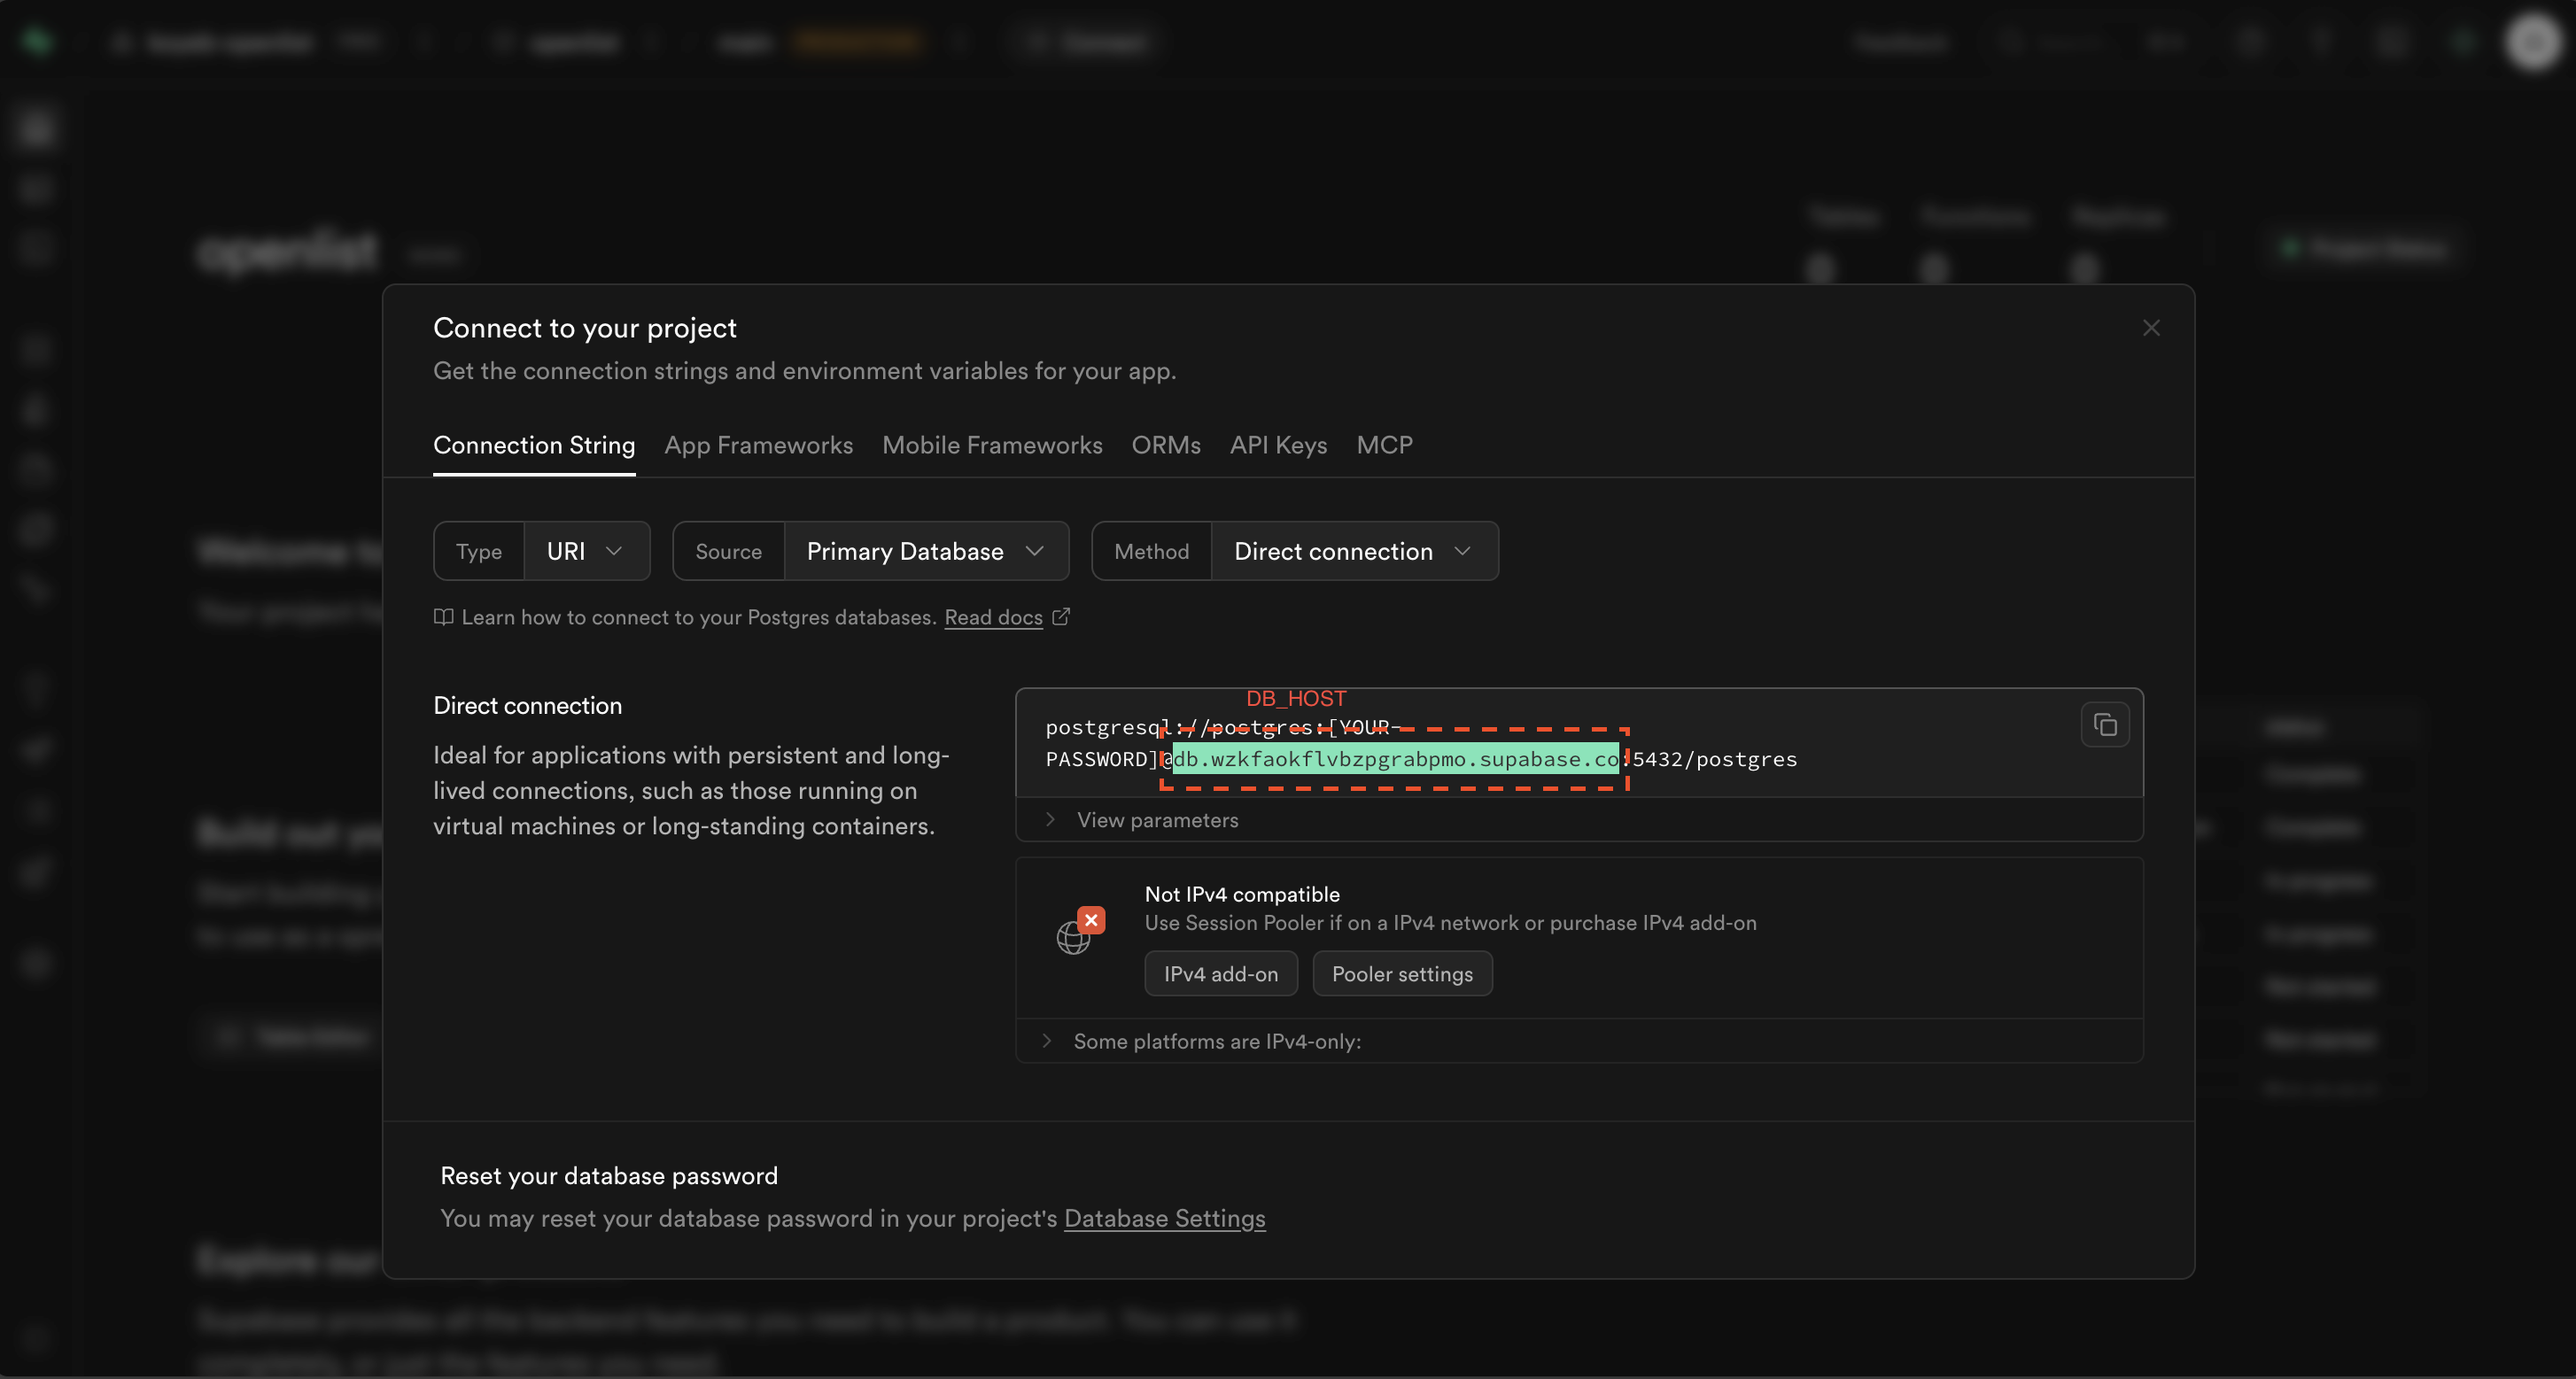
- Open the new project and click the Connect button to find the DB_HOST.
创建数据库
登录Supabase
- 创建一个新项目
- New project中设置 Database password 并记好,Region选择Central EU(Frankfurt)。
建议选择与Koyeb服务器接近的Region,Frankfurt或Washington D.C
- 进入新建的project点击Connect按钮可查看DB_HOST
Create the Service
- Sign in to the Koyeb console and click Create App.
- Select Docker under Web service.
- Set Image to
openlistteam/openlist:latestand click Next. - Choose the Free instance under CPU Eco 🌱 and click Next.
创建服务
- 登录 Koyeb 控制台,点击 Create App。
- 选择Web service中的 Docker。
- 将 Image 设置为
openlistteam/openlist:latest,点击Next。 - 选择CPU Eco 🌱中的Free服务器点击Next
Configure Deployment
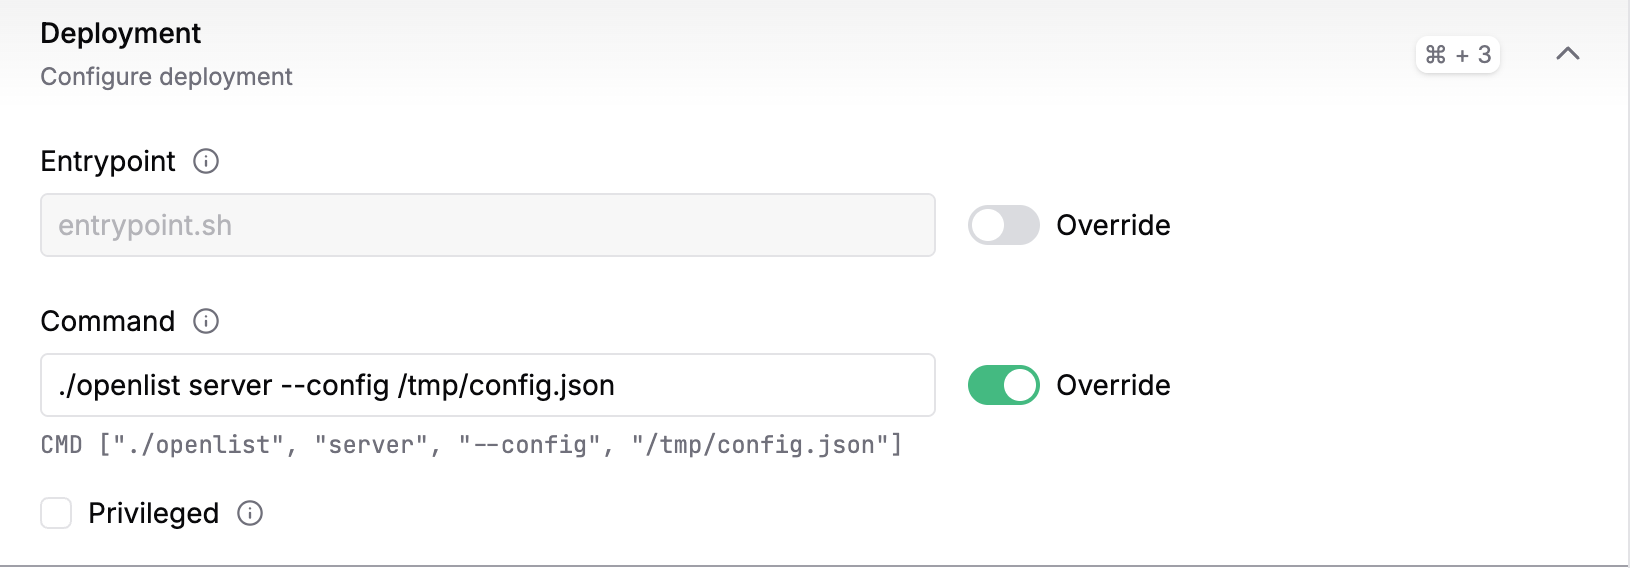
- Enable the Override toggle next to Command.
- Enter
./openlist server --config /tmp/config.jsonin the input box.WARNING
You must specify the config file path; otherwise you will get the error: the current user does not have write and/or execute permissions on the
./datadirectory (/opt/openlist/data).
设置Deployment
- 打开Command后的Override开关
- 在框中输入
./openlist server --config /tmp/config.jsonWARNING
必须指定openlist的配置文件地址,不然会导致 错误:当前用户没有 ./data 目录(/opt/openlist/data)的写和/或执行权限。
Set up Environment Variables and Files
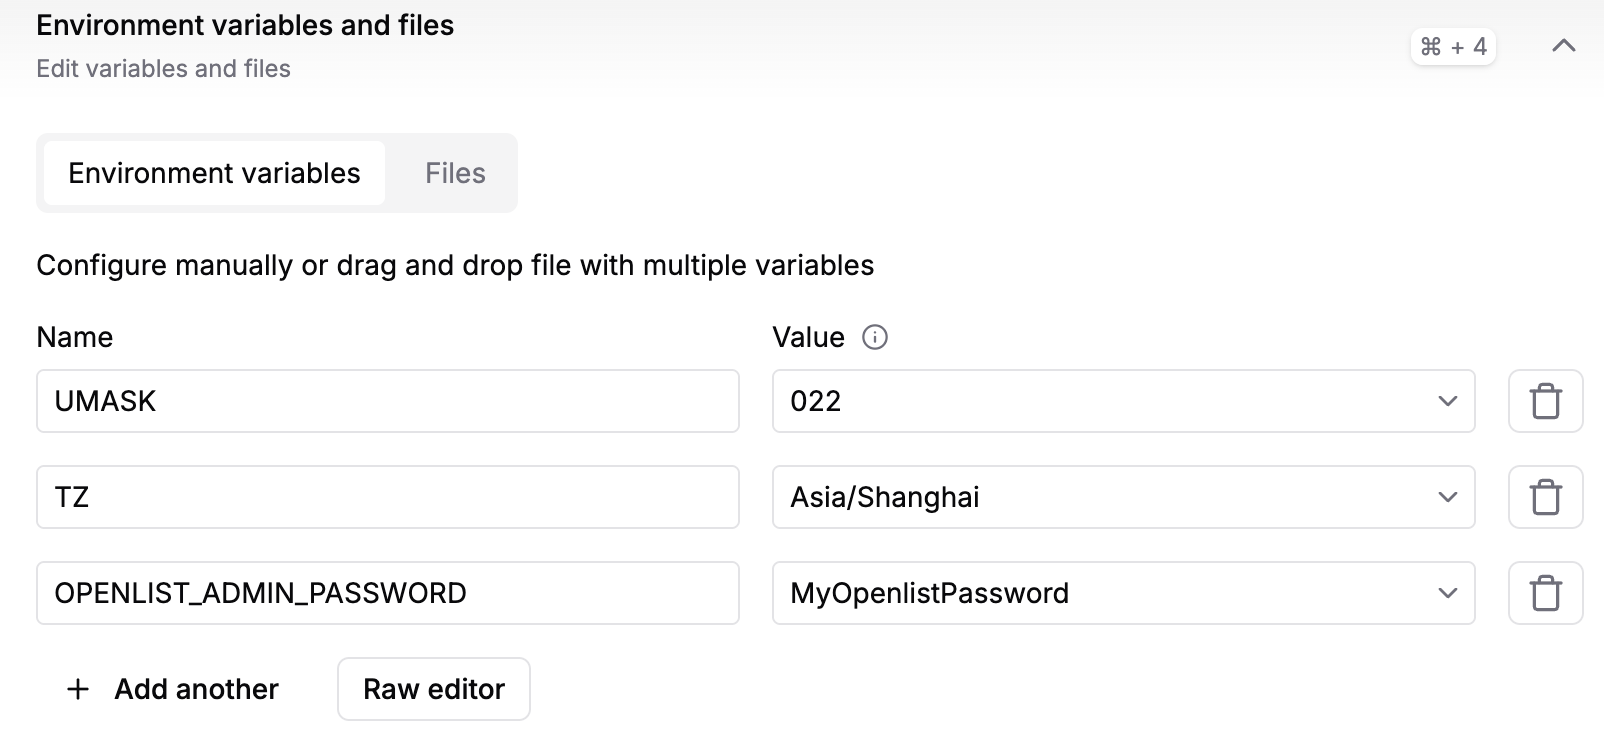
Add environment variables
| Key | Value | Purpose |
|---|---|---|
TZ | Asia/Shanghai (or any timezone) | Set the container timezone |
UMASK | 022 | https://en.wikipedia.org/wiki/Umask |
OPENLIST_ADMIN_PASSWORD | Initial admin password | Strongly recommended; otherwise a random password is generated on every restart |
Add configuration file
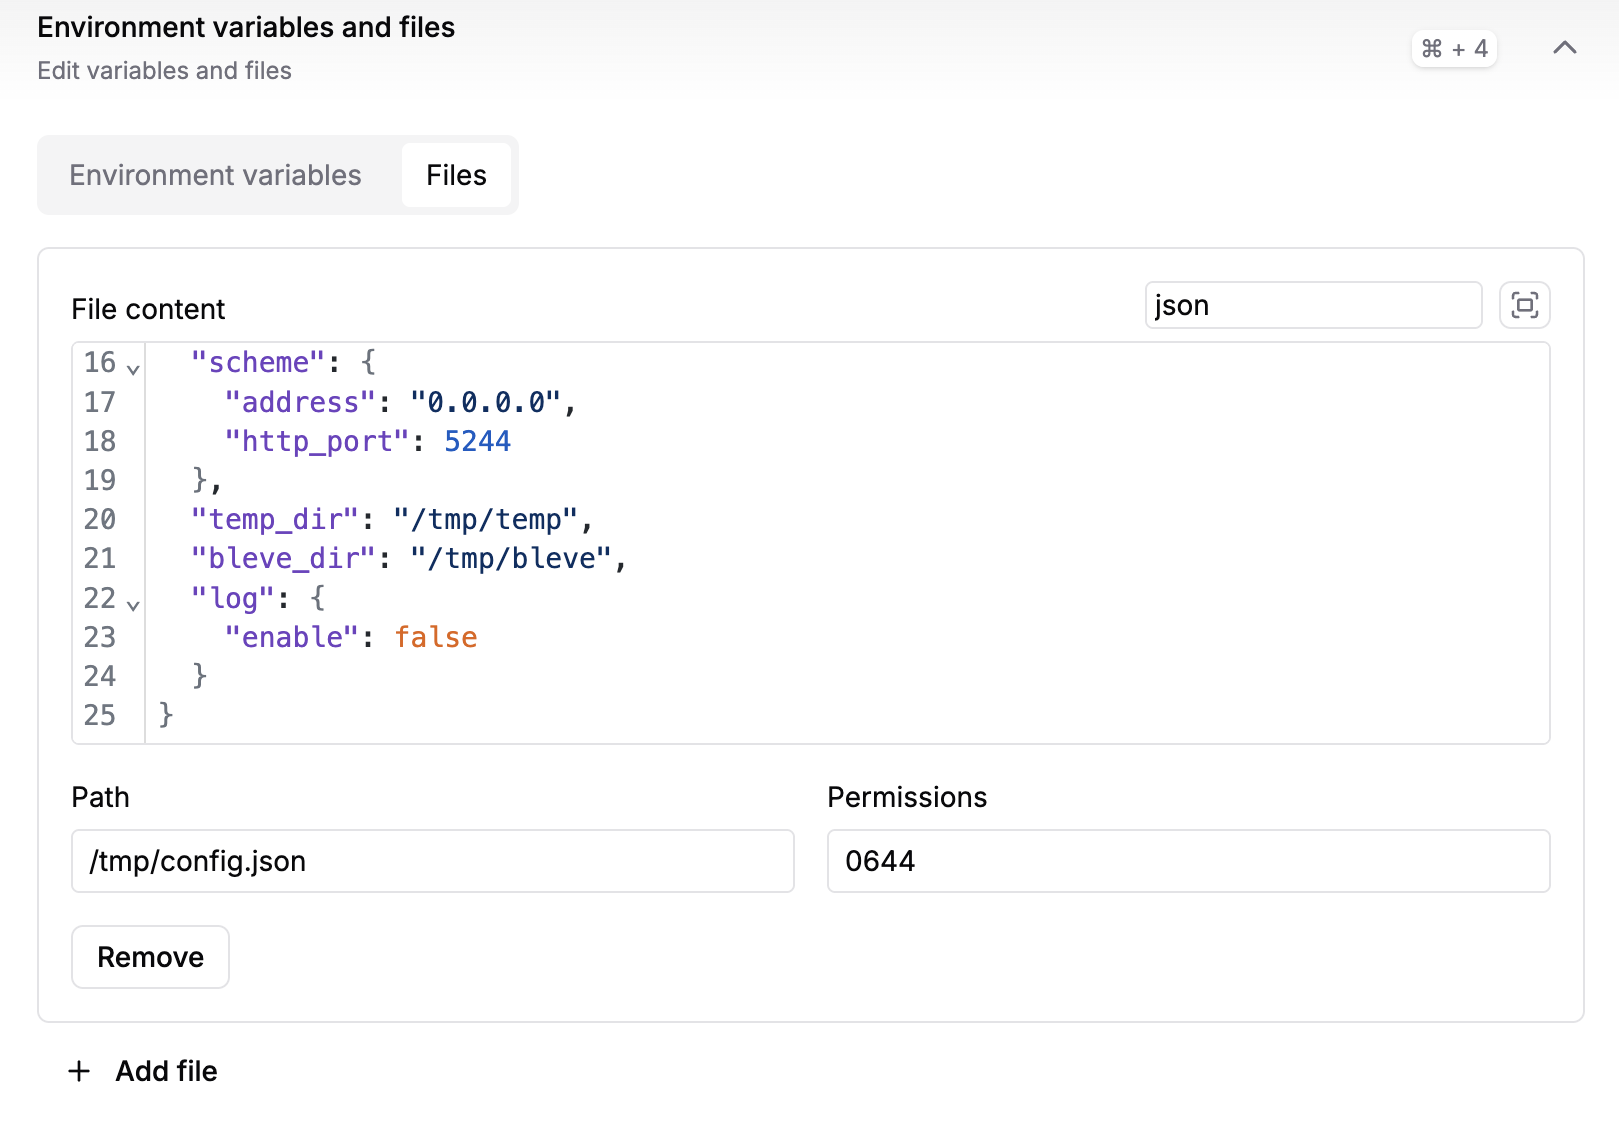
Switch to the Files tab, click Add file, and set Path to /tmp/config.json (matching the path specified in the Command).
Enter the following in File content:
json
{
  "force": false,
  "jwt_secret": "random_generated",
  "database": {
    "type": "postgres",
    "host": "replace_with_your_DB_HOST",
    "port": 5432,
    "user": "postgres",
    "password": "replace_with_your_database_password",
    "name": "postgres",
    "db_file": "",
    "table_prefix": "x_",
    "ssl_mode": "require",
    "dsn": ""
  },
  "scheme": {
    "address": "0.0.0.0",
    "http_port": 5244
  },
  "temp_dir": "/tmp/temp",
  "bleve_dir": "/tmp/bleve",
  "log": {
    "enable": false
  }
}
设置 Environment variables and files
添加环境变量
| Key | Value | 用途 |
|---|---|---|
TZ | Asia/Shanghai(或任意时区) | 设置容器时区 |
UMASK | 022 | https://en.wikipedia.org/wiki/Umask |
OPENLIST_ADMIN_PASSWORD | admin的起始密码 | 强烈建议设置,不然每次服务重启都会随机生成 |
添加配置文件
切换到Files,点击Add file,将Path设置为/tmp/config.json(与Command中指定的一致)
File content中填入:
json
{
  "force": false,
  "jwt_secret": "random_generated",
  "database": {
    "type": "postgres",
    "host": "这里替换为你的DB_HOST",
    "port": 5432,
    "user": "postgres",
    "password": "这里替换为你的数据库密码",
    "name": "postgres",
    "db_file": "",
    "table_prefix": "x_",
    "ssl_mode": "require",
    "dsn": ""
  },
  "scheme": {
    "address": "0.0.0.0",
    "http_port": 5244
  },
  "temp_dir": "/tmp/temp",
  "bleve_dir": "/tmp/bleve",
  "log": {
    "enable": false
  }
}
Configure Ports
Change the Port to 5244.
设置Ports
将Port改为5244
Deploy and Verify
- Review the summary and click Save and deploy.
- After a short wait you should see OpenList initialization messages in the LOG panel.
- Once deployment is complete, click the link provided by Koyeb to access OpenList.
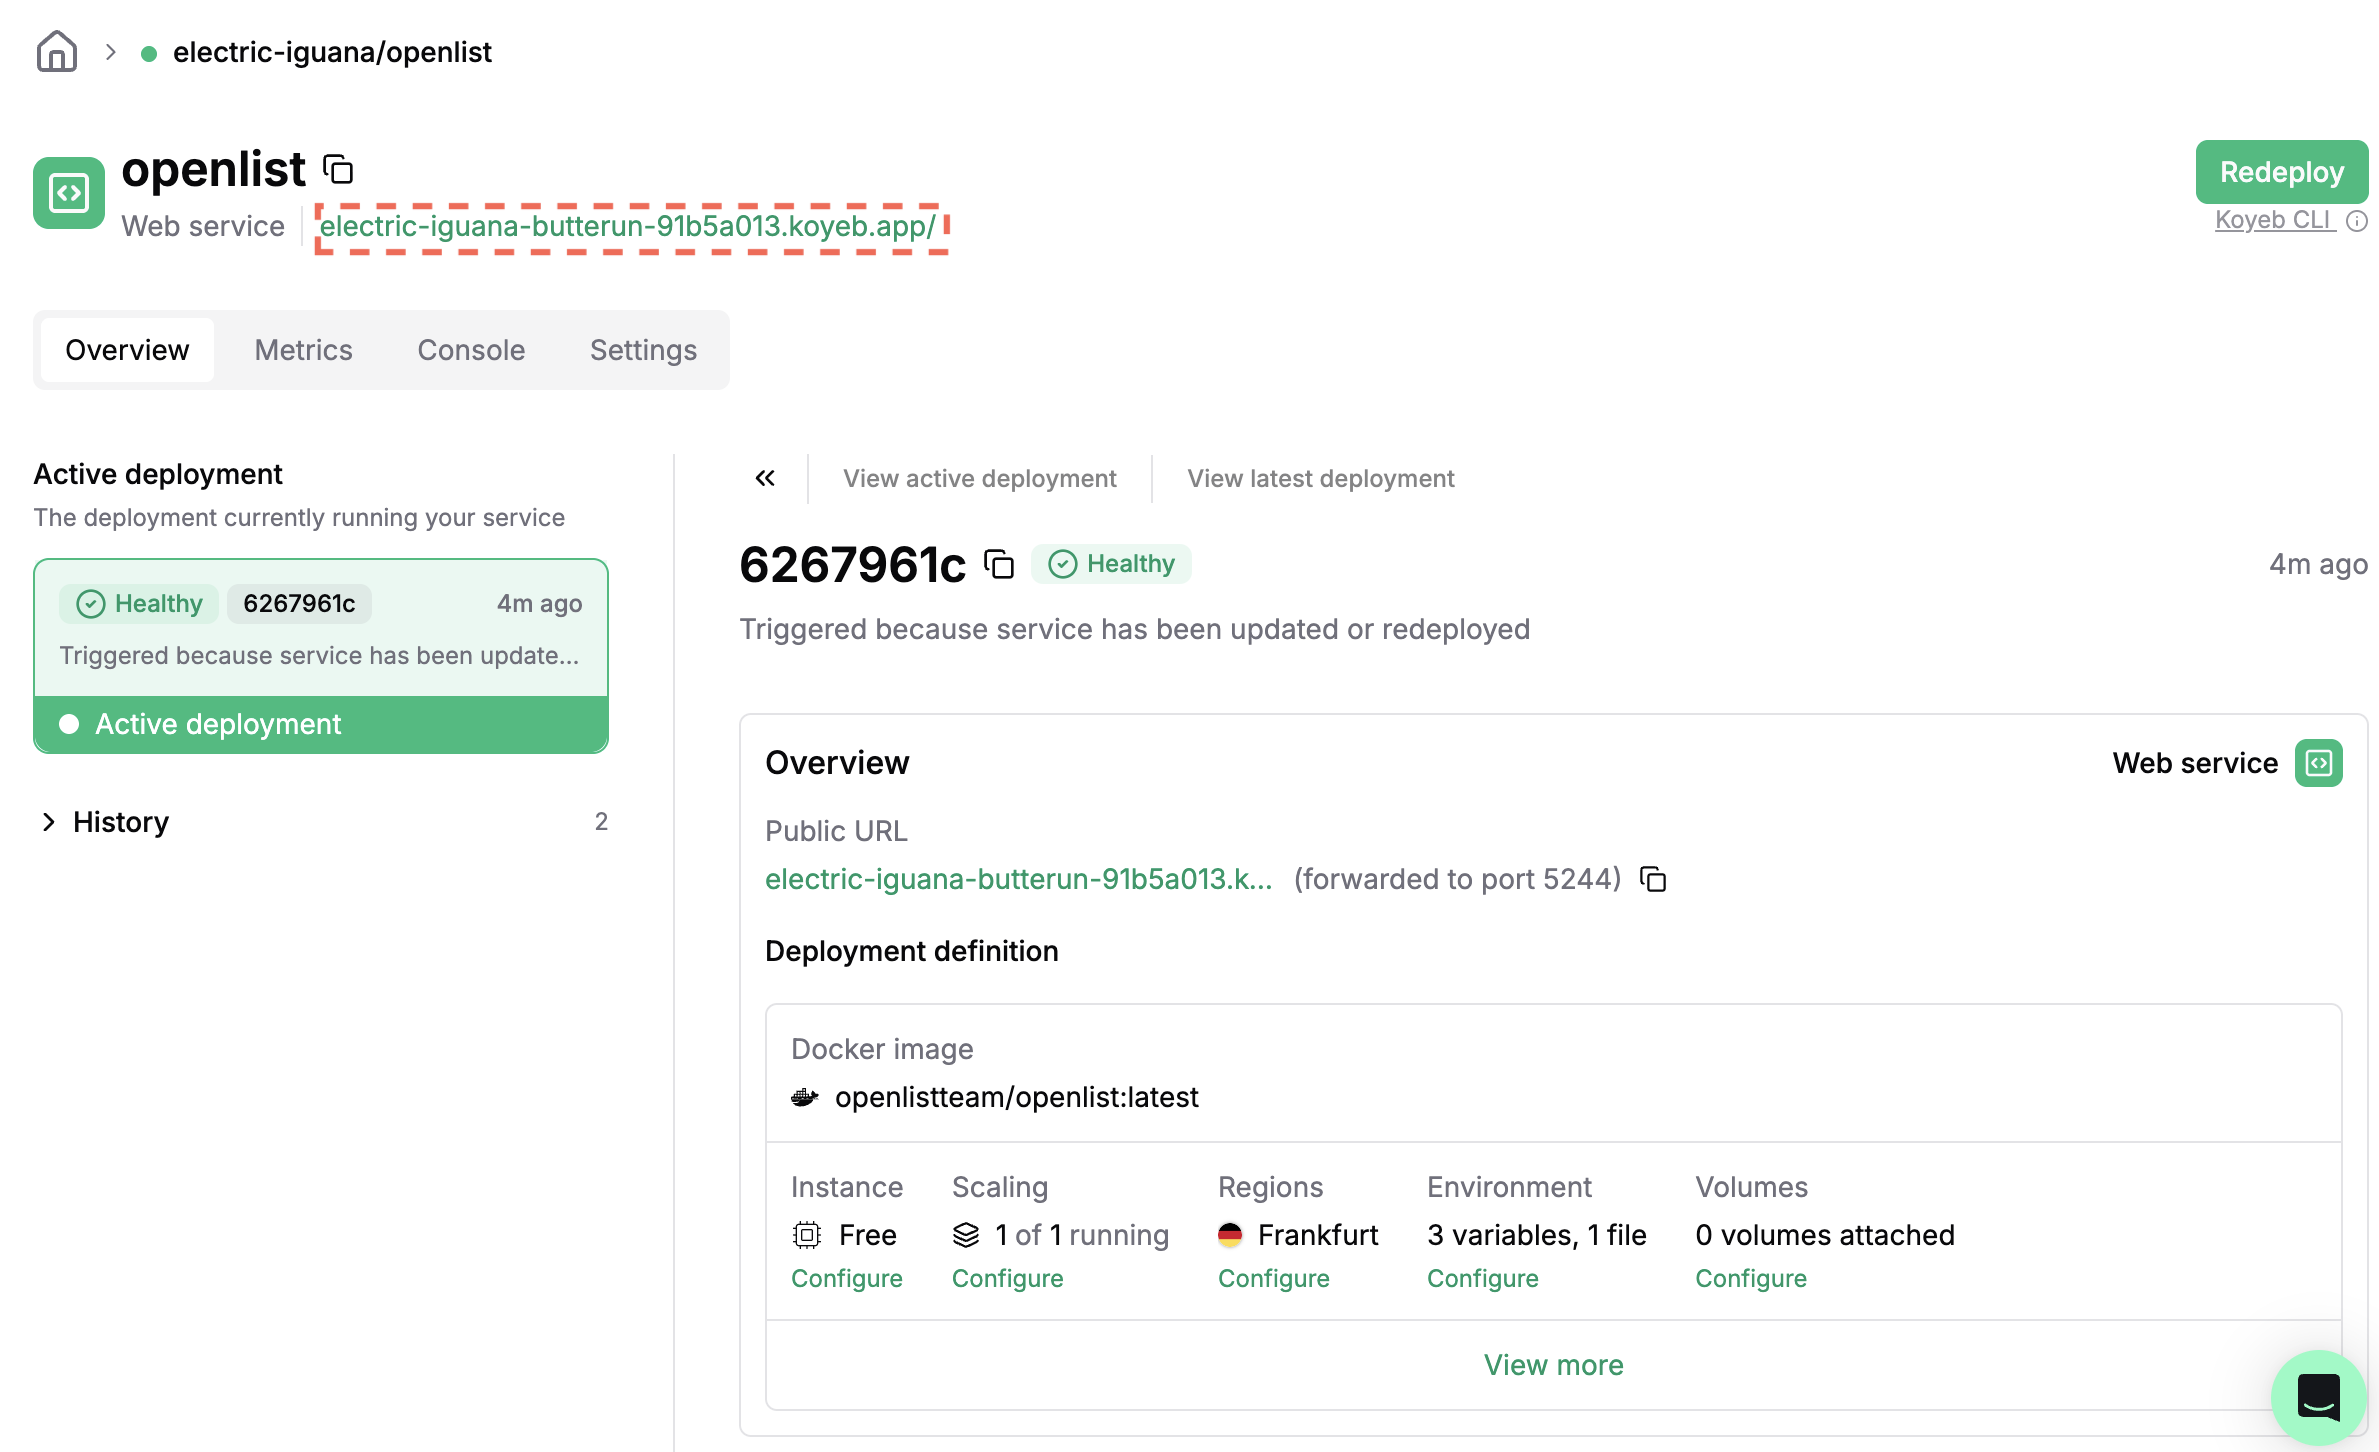
部署与验证
- 核对摘要信息后点击 Save and deploy。
- 稍等一会就能在LOG窗口中看到 OpenList 的初始化信息。
- 如果没有其它问题,部署完成之后即可点击Koyeb给的链接访问openlist了。
Updates and Maintenance
- Updates: Go to the Service detail page. If the image is set to
latest, simply click Redeploy when a new version is available. - Logs: View real-time logs on the Service detail page, or click Details under Scaling.
更新与维护
- 更新:进入Service详情页,如果之前设置的镜像为latest,当有新版本时手动点击Redeploy即可更新版本
- 日志:在Service详情页查看实时日志,或在Scaling中点击Details。